Here is a card I made earlier this year for my niece which was sent all the way to Finland : ) I thought I would ink up some Magnolia stamps after a long 'dry' stamping spell and creat a little scene. As it was my first attempt at using them to create a background scene I thought I would take photos to help any other stampers out there which are starting out stamping.
You will need:
- Black ink, if using alcohol markers or using prismas & sansador I would recommend using Memento Tuxedo Black
- White Card, minimum of 220gsm if your using alcohol markers otherwise the colour may bleed through the card
- Post it notes
- Magnolia Background stamps or alternatively images (which you will need to cut out closely and layer as an alternative to masking): Magnolia Swing, Magnolia Butterfly Background, Magnolia Berry Tilda, Magnolia Rufus
- Spellbinders Nestabilities (I've used Labels) which you can use as an aid to create a 'frame' to assess whether the scene is 'coming together'.
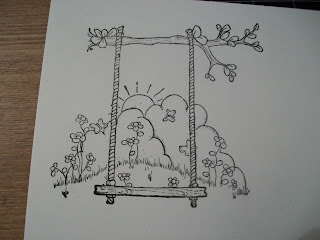
Firstly, stamp the Magnolia Swing on to white card, stamp again onto a post it note and cut around either the whole image or just around the rope/swing platform
Thirdly, ink Magnolia Butterfly Background and stamp over the masked Magnolia Swing image. It might help beforehand to stick the Magnolia Butterfly Background stamp onto a Clear CD case to ascertain where to position the stamp before stamping as demonstrated below:
Next, remove the post it note (retain for future usage!) and you will have created your very own background scene for your card!
If you wanted to create a 'flat background' you could also incorporate Magnolia's Berry Tilda & Rufus but I wanted to create dimension with the card so I opted to stamp Tilda seperately so they would 'pop out' and proceeded to use Spellbinders Nestabilities (Labels) to frame the background image:
The end result:
Hope you've found this helpful and hope to find time to post soon!
Daffodil Nellie.


